Steps
Create
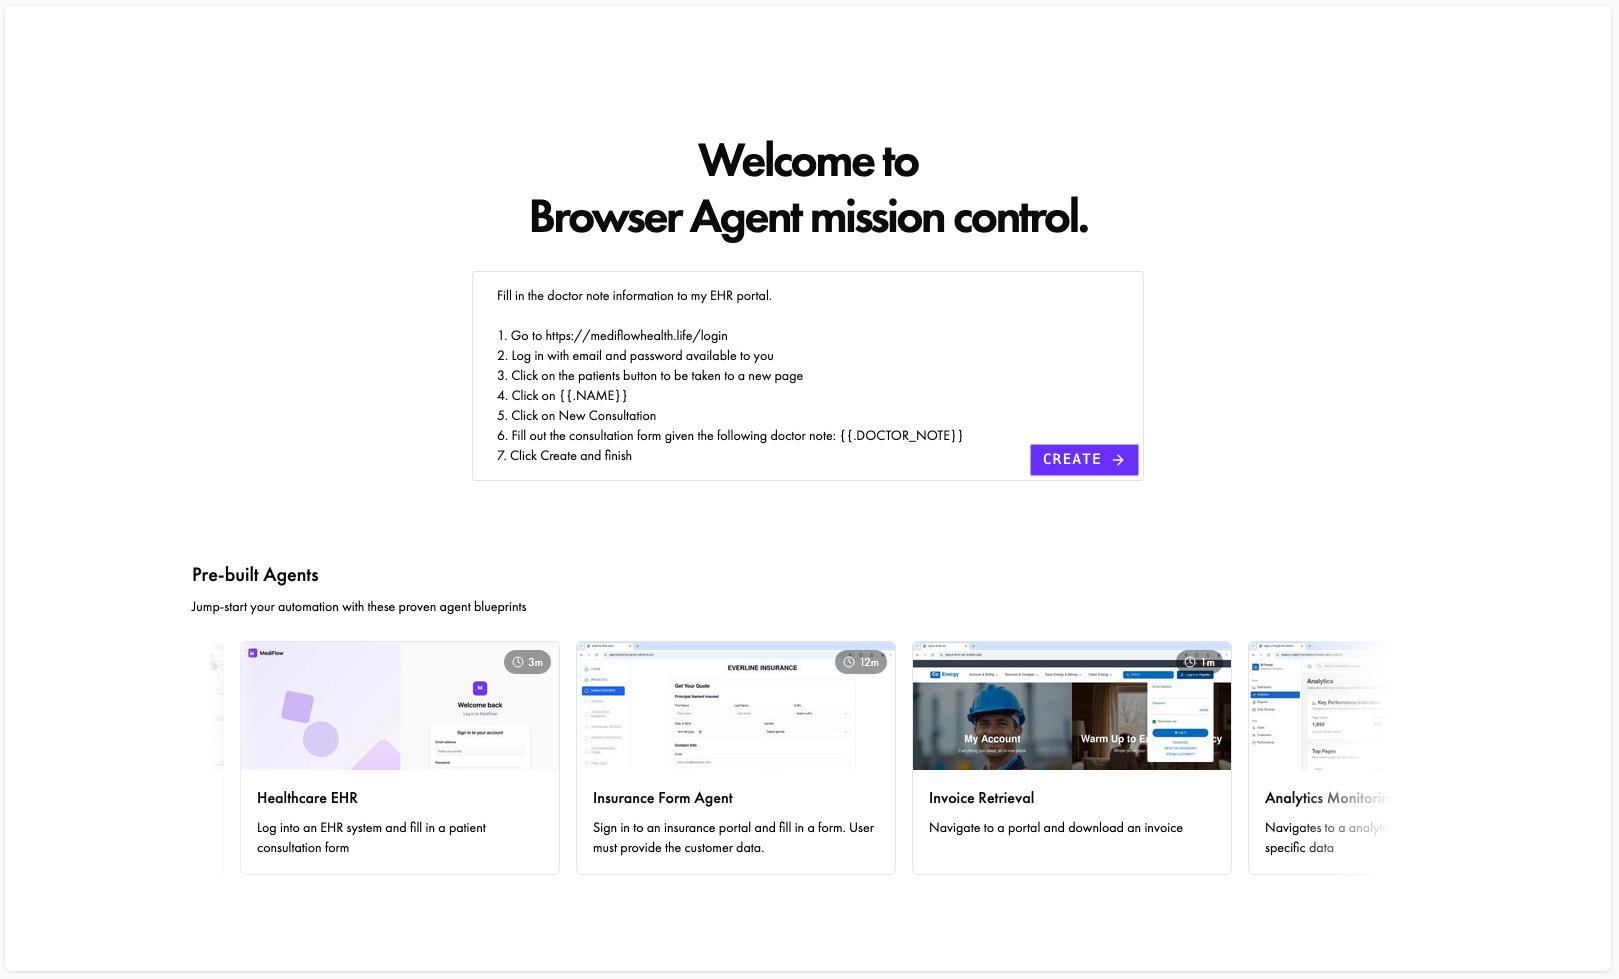
Create Page
After signing in, create a new agent and describe the automation task you want it to perform.
- Provide credentials for the agent to use
- Declare variables that will be supplied at runtime
Learn more about Agent Profiles and Dynamic Variables.
Configure
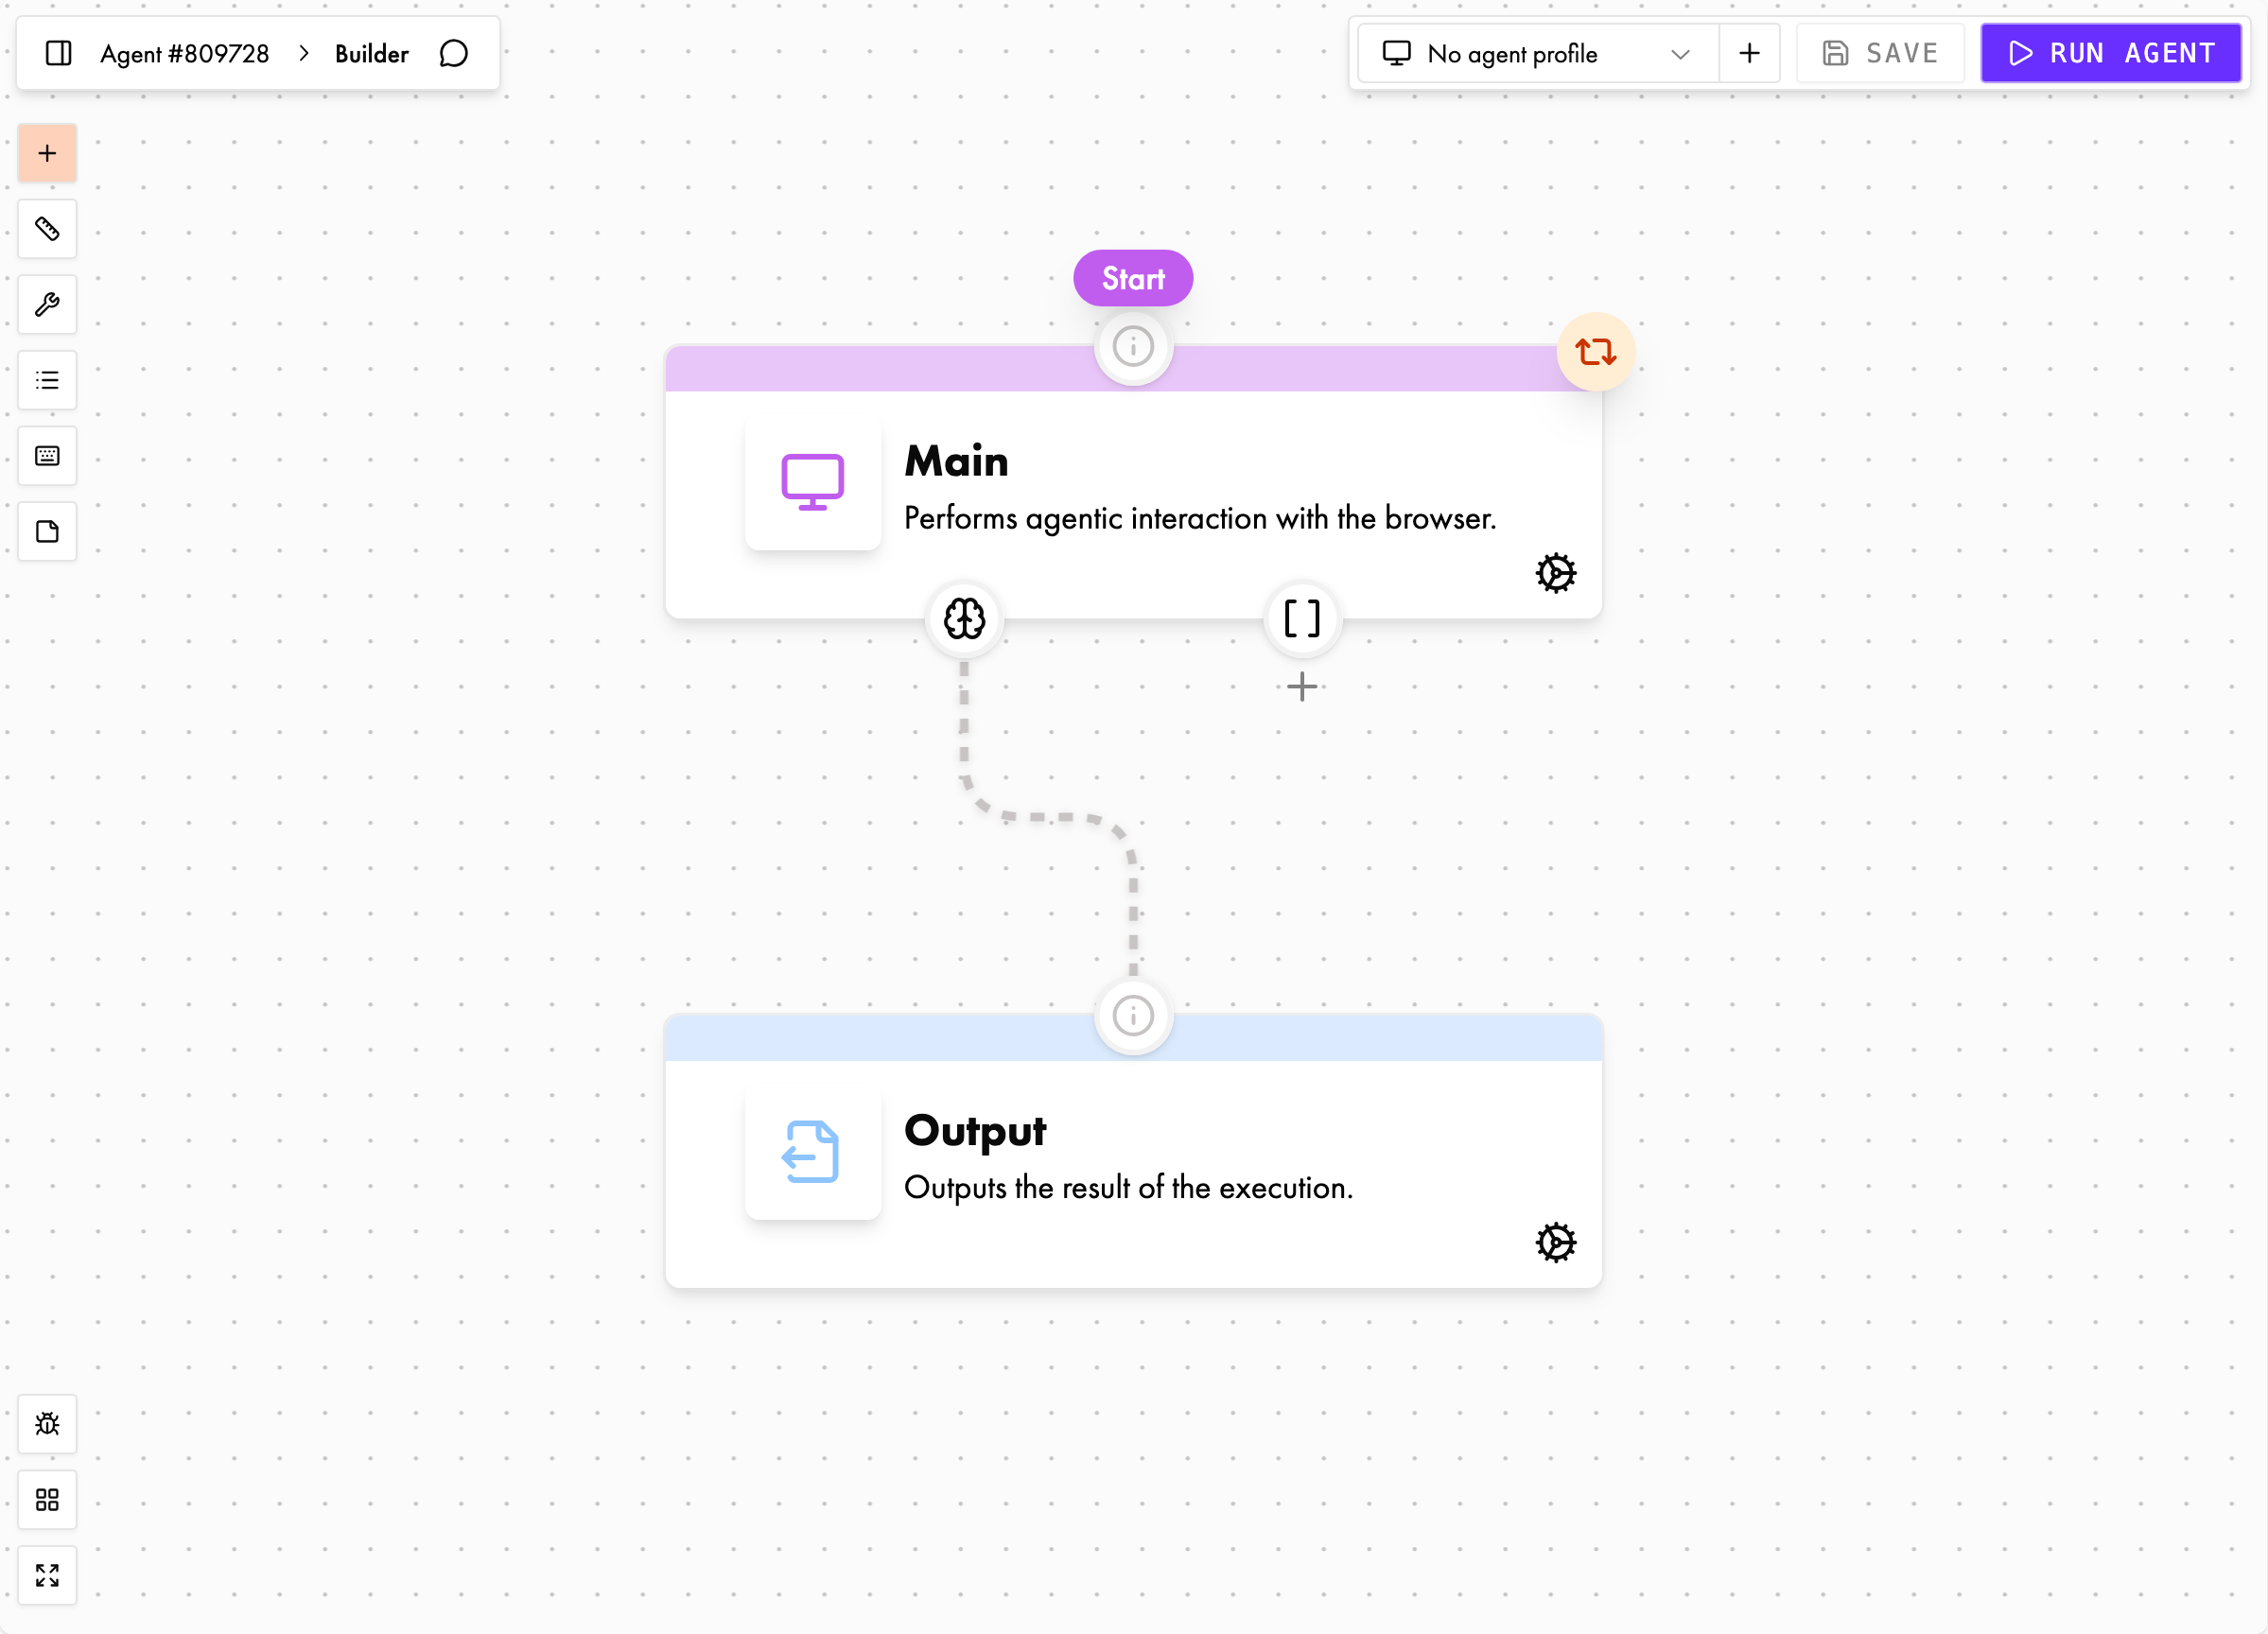
Builder Page
Once your agent is created, you can refine its behavior in the Graph Builder.
- Agent Name — Give it a clear, meaningful name
- Nodes — Break the workflow into smaller, deterministic subtasks
- Transitions — Define the logical sequence the agent should follow
For a deeper dive into our graph-based approach, see the Graph Agents guide.
Run
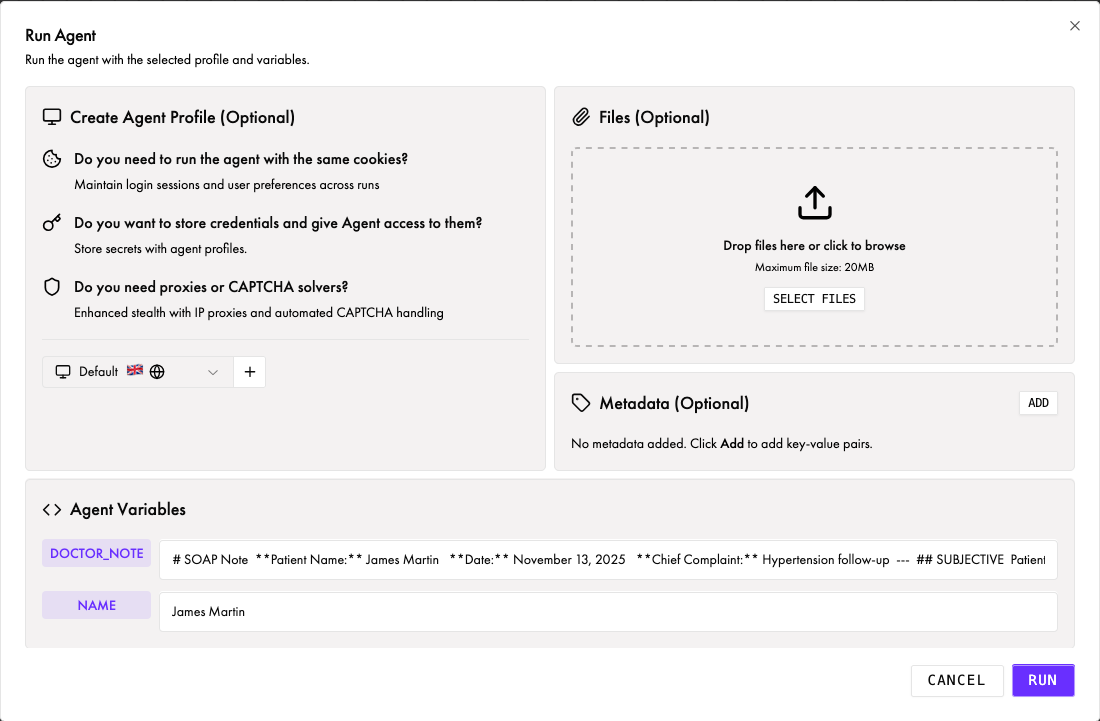
Run Config
Before launching a run, configure variables, credentials, and environment options.
- Select or create an Agent Profile (credentials, browser settings, etc.)
- Provide values for any dynamic variables referenced in your node instructions
You can also upload Files for your agent to reference during execution.
Monitor
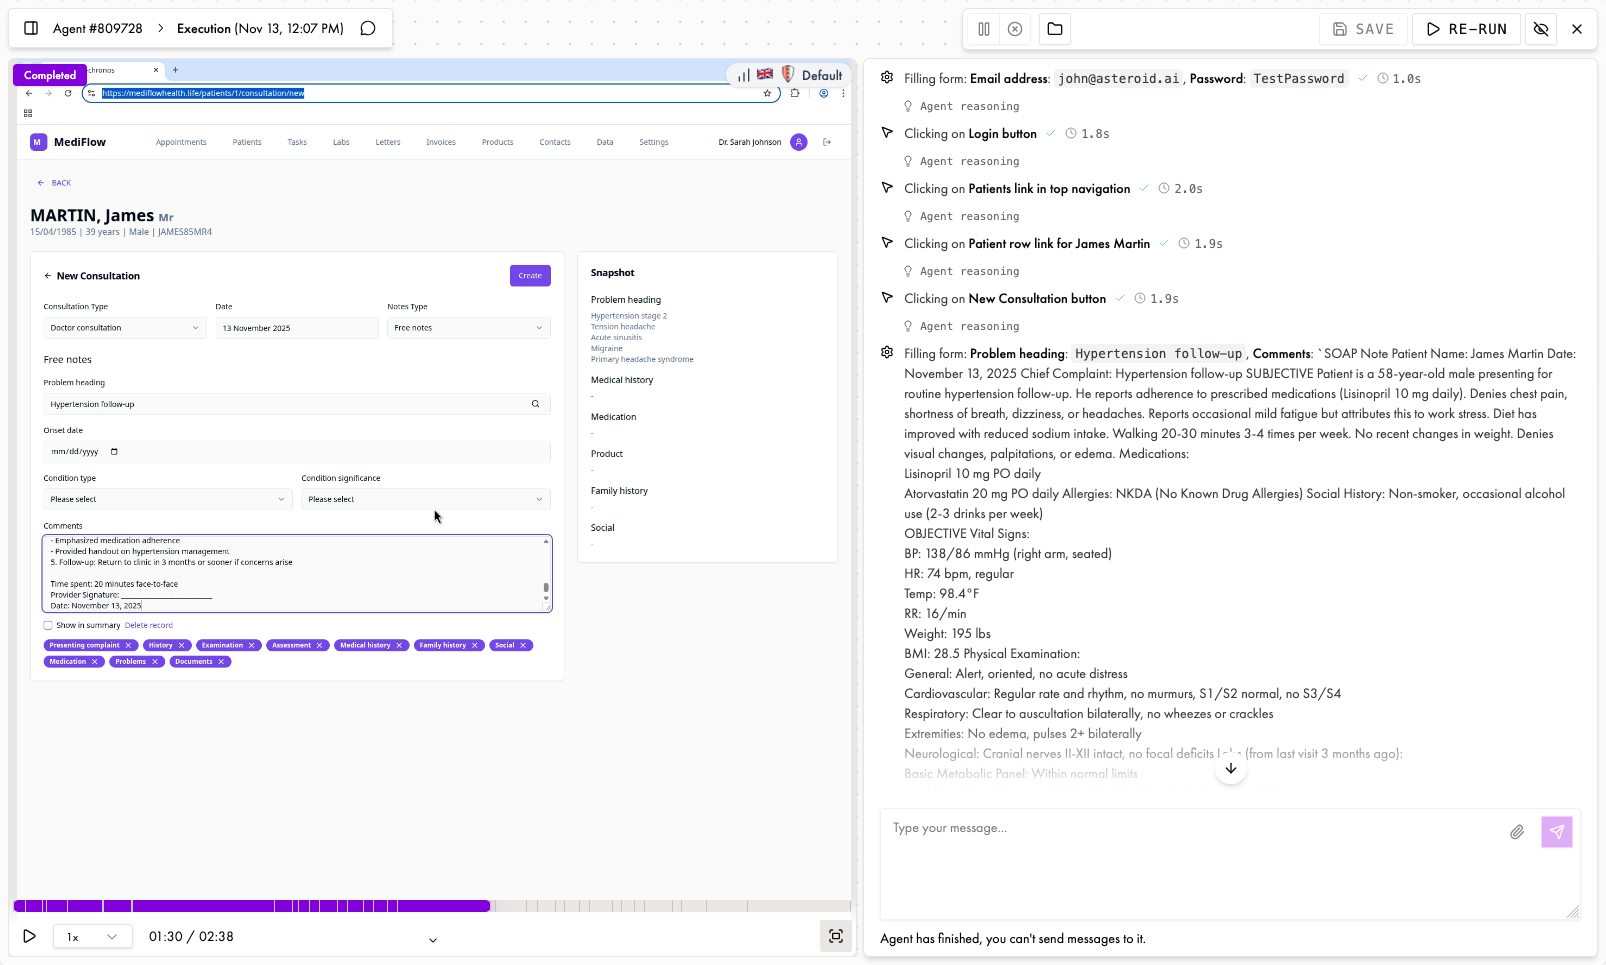
Execution Page
Watch your agent in action with real-time monitoring.
- Send messages to the agent
- Pause or cancel the run
- Interact with the browser directly
- Apply live edits to the graph
Iterate & Improve
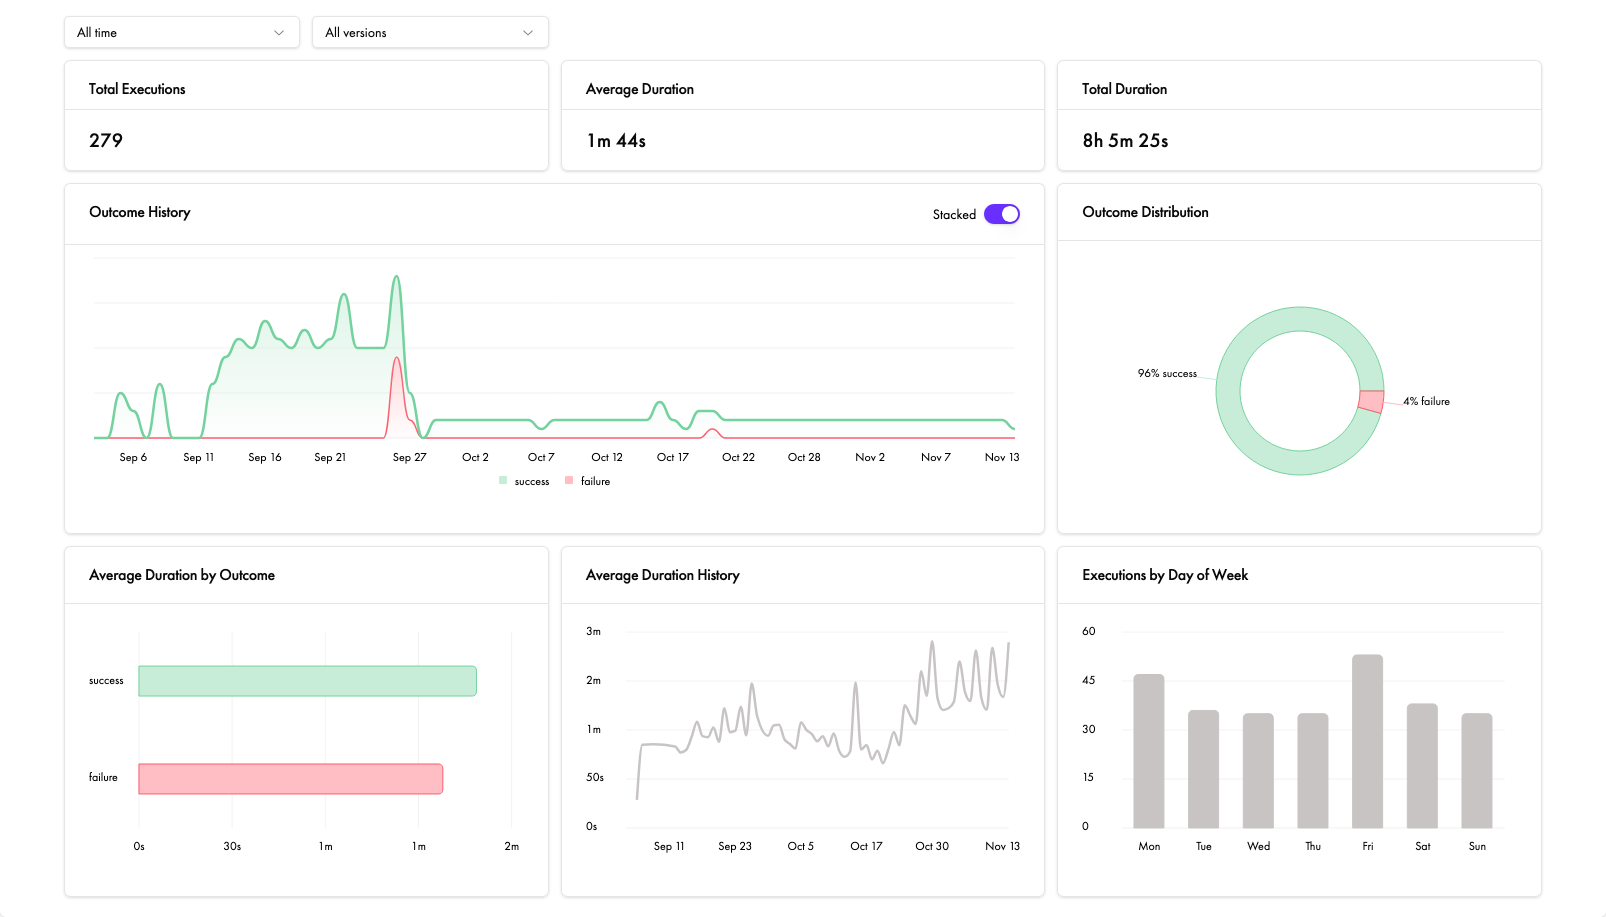
Stats Page
Review past outcomes to understand what worked and what didn’t.
- Agent couldn’t find an element: Make instructions more specific
- Agent took the wrong action: Clarify instructions or add edge case handling
- Agent got stuck: Add clearer success criteria or break into smaller nodes
- Refine instructions based on what you observed
- Add edge cases and failure paths
- Split complex nodes into smaller, focused ones
- Test with different dynamic variable values
- Start simple: Get a basic version working first, then add complexity
- Test incrementally: Make small changes and test after each modification
- Use descriptive names: Name nodes and variables clearly so the graph is self-documenting
- Document edge cases: Add notes about known variations in your instructions
For more guidance, see Graph Agents for design best practices and Output Nodes for handling different outcomes.
Start Building Now!
Ready to build your first automation? Open the Asteroid platform and start building.